Adding New Stores
Incorporating new stores into your LMS is a vital step to ensure that your organization's specific locations are well-represented within the platform. This section provides a guide on seamlessly integrating new stores.
Step 1: Navigate to Company Management Section
Once logged in, locate the “Admin Portal” section on the top navigation bar of the LMS dashboard.
On the dropdown menu, click on “Manage Users”.
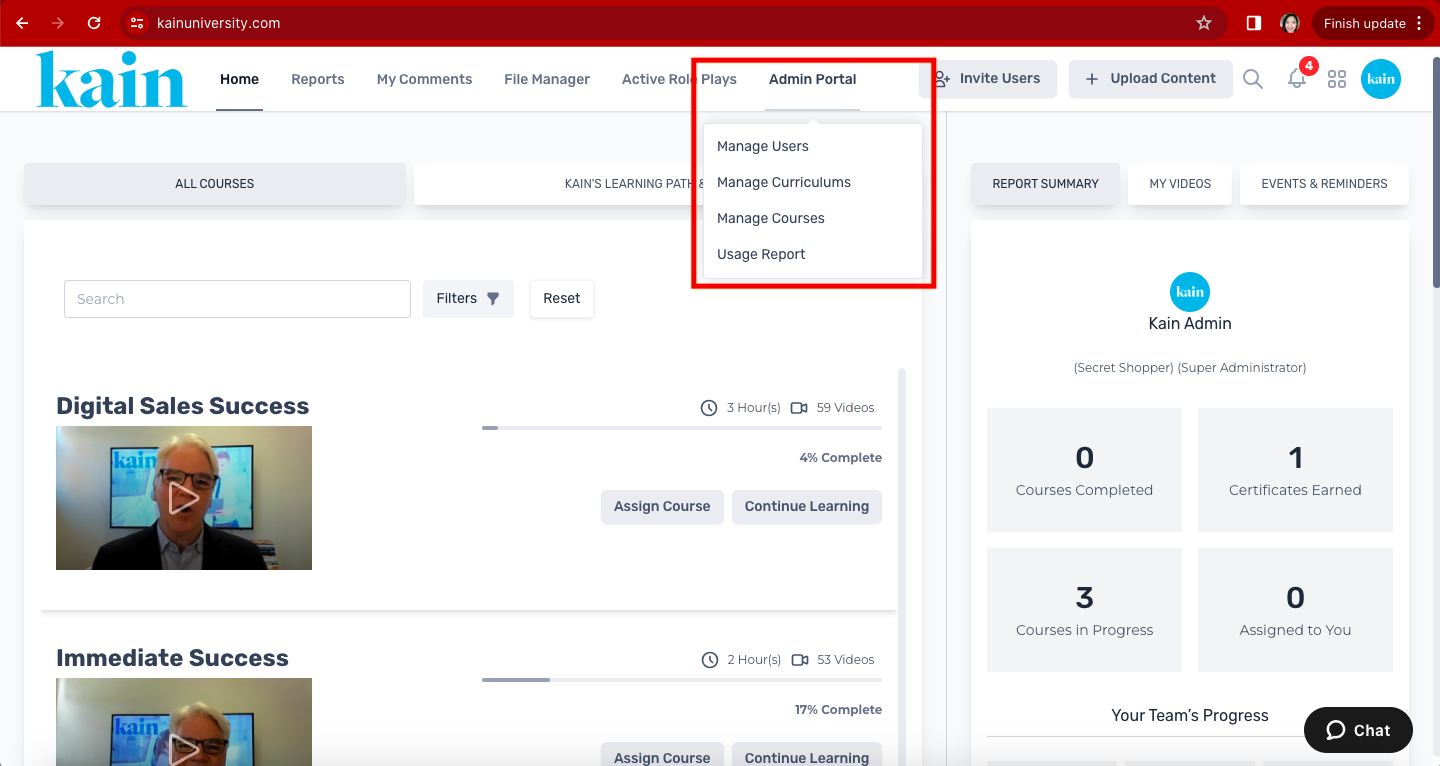
A new tab will open to the User Management Interface.
On the sidebar, click on “Stores”.
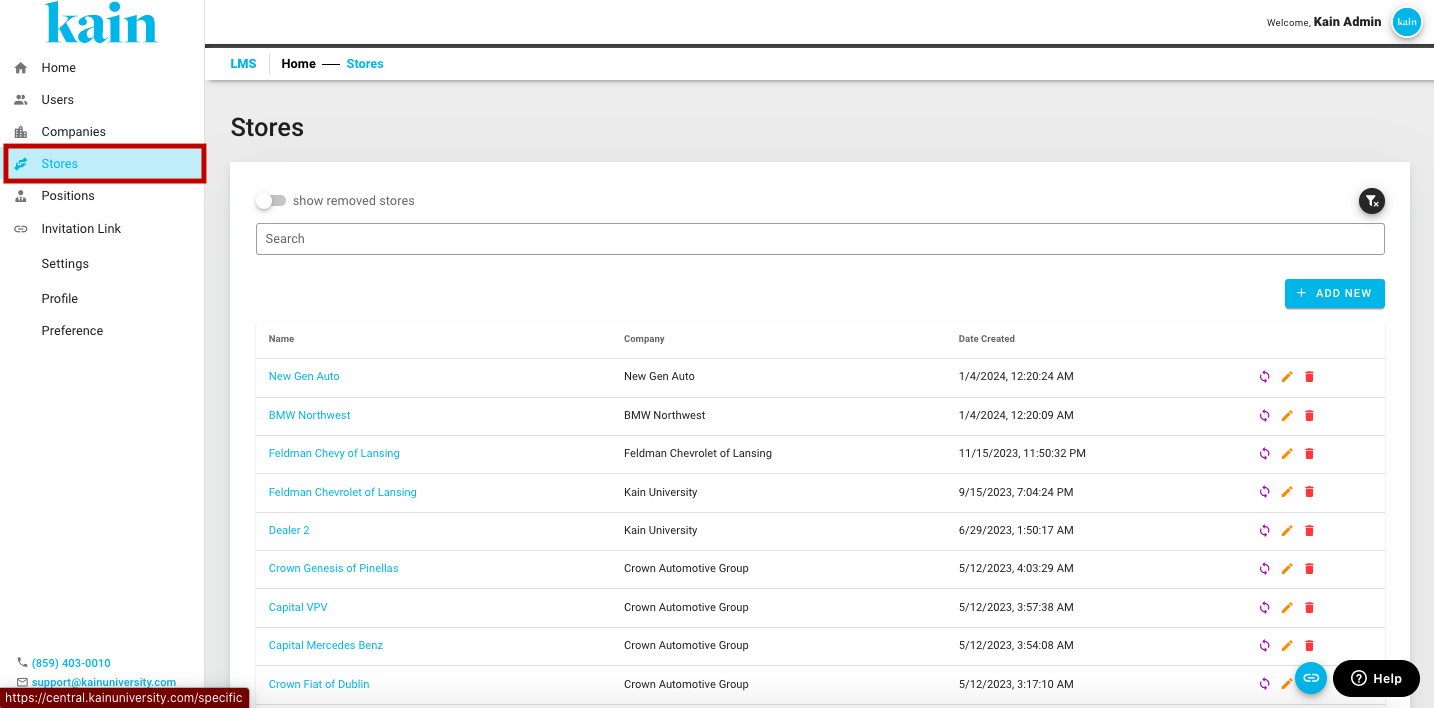
Step 2: Initiate Adding a New Company
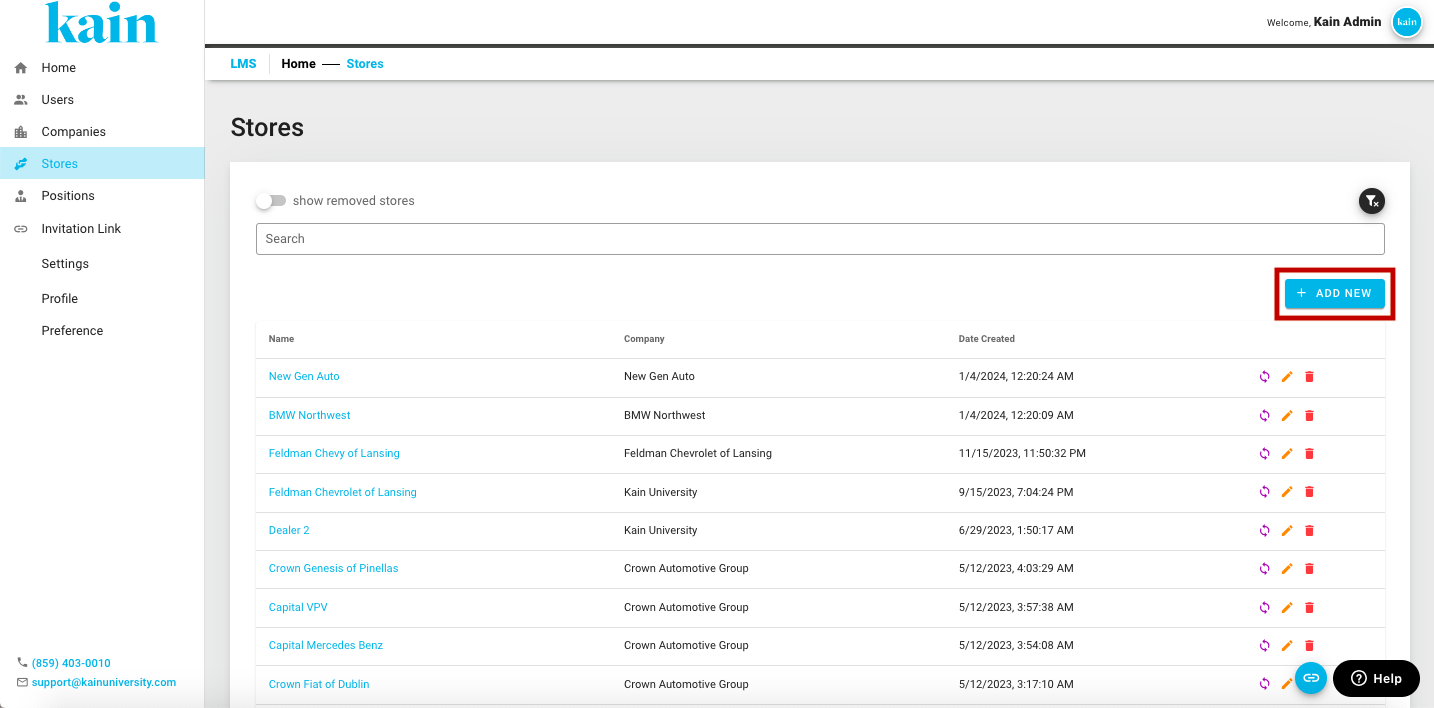
On the Store Management Interface, click on the “+ Add New” button.
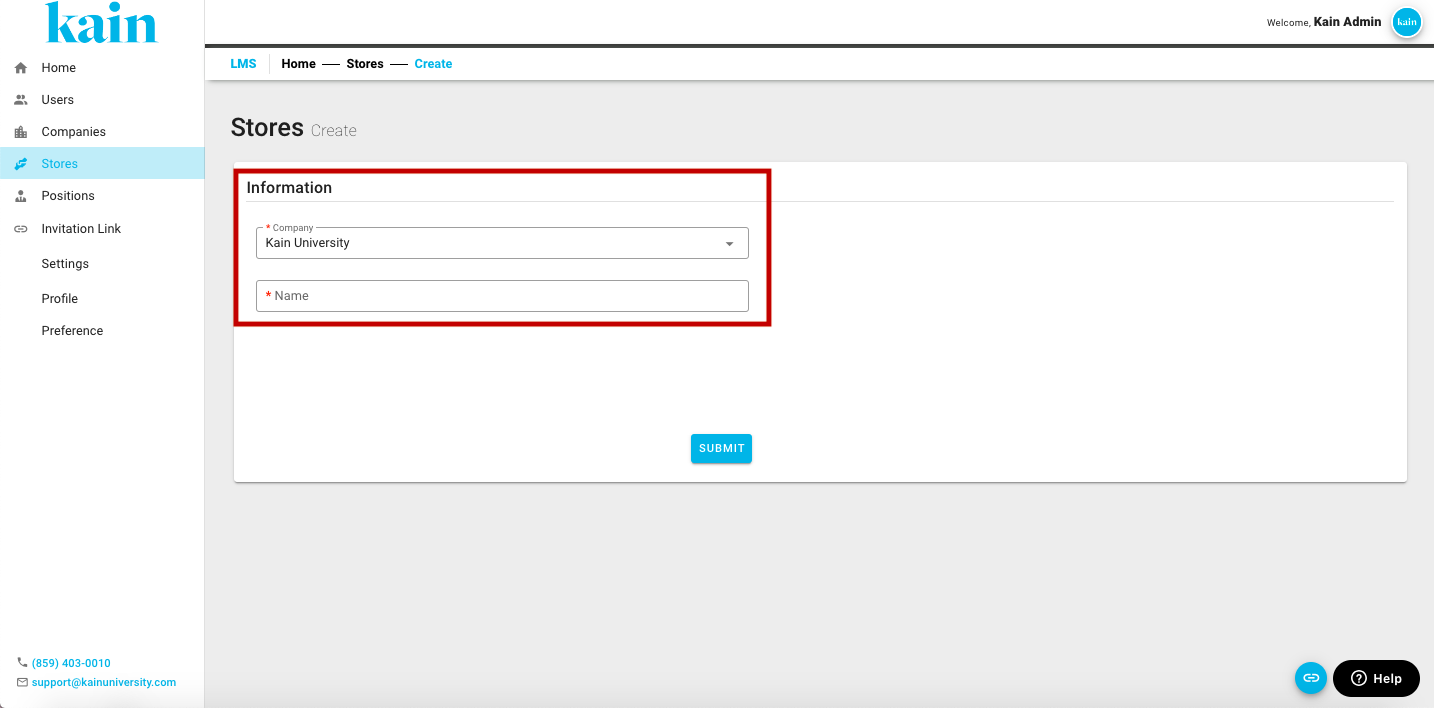
Step 3: Fill in Store Details:
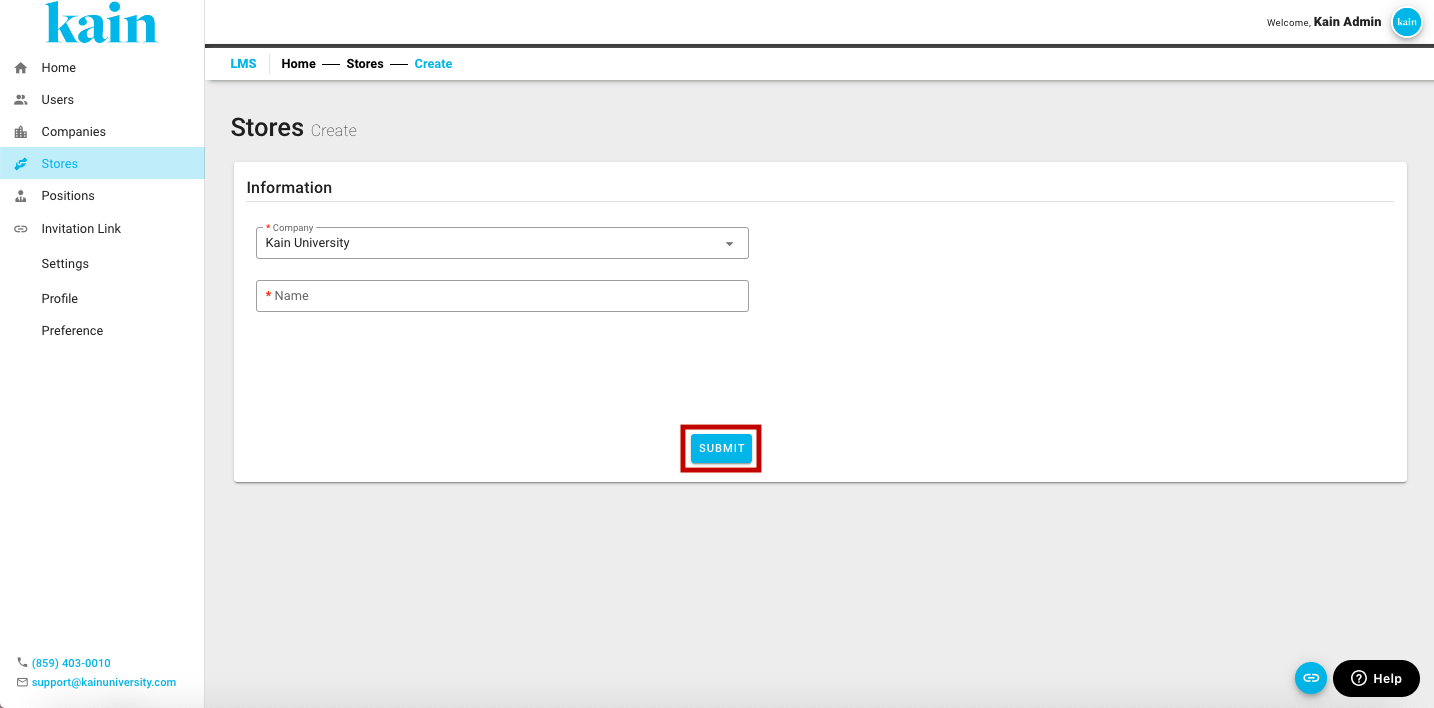
Select a Company for the Store from the dropdown menu.
Enter the Store Name.
Step 4: Save and Confirm
Review the store details to make sure the information is accurate.
Click on the “Submit” button to add the new company to the system.
