Adding New Companies
Adding new companies to your LMS is a fundamental step in tailoring the platform to the diverse needs of your organization. This section outlines a straightforward process to seamlessly integrate new companies into the LMS.
Step 1: Navigate to Company Management Section
Once logged in, locate the “Admin Portal” section on the top navigation bar of the LMS dashboard.
On the dropdown menu, click on “Manage Users”.
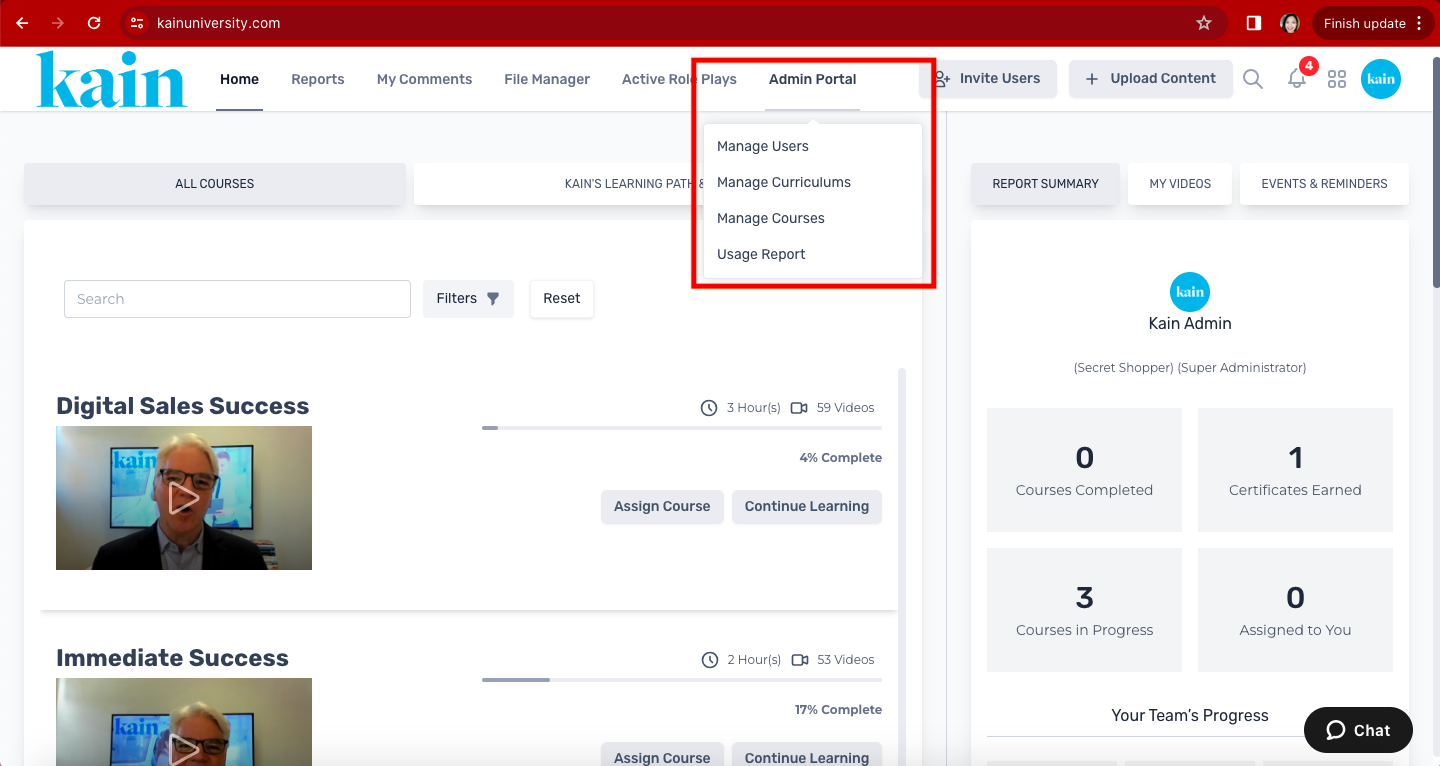
A new tab will open to the User Management Interface.
On the sidebar, click on “Companies”.
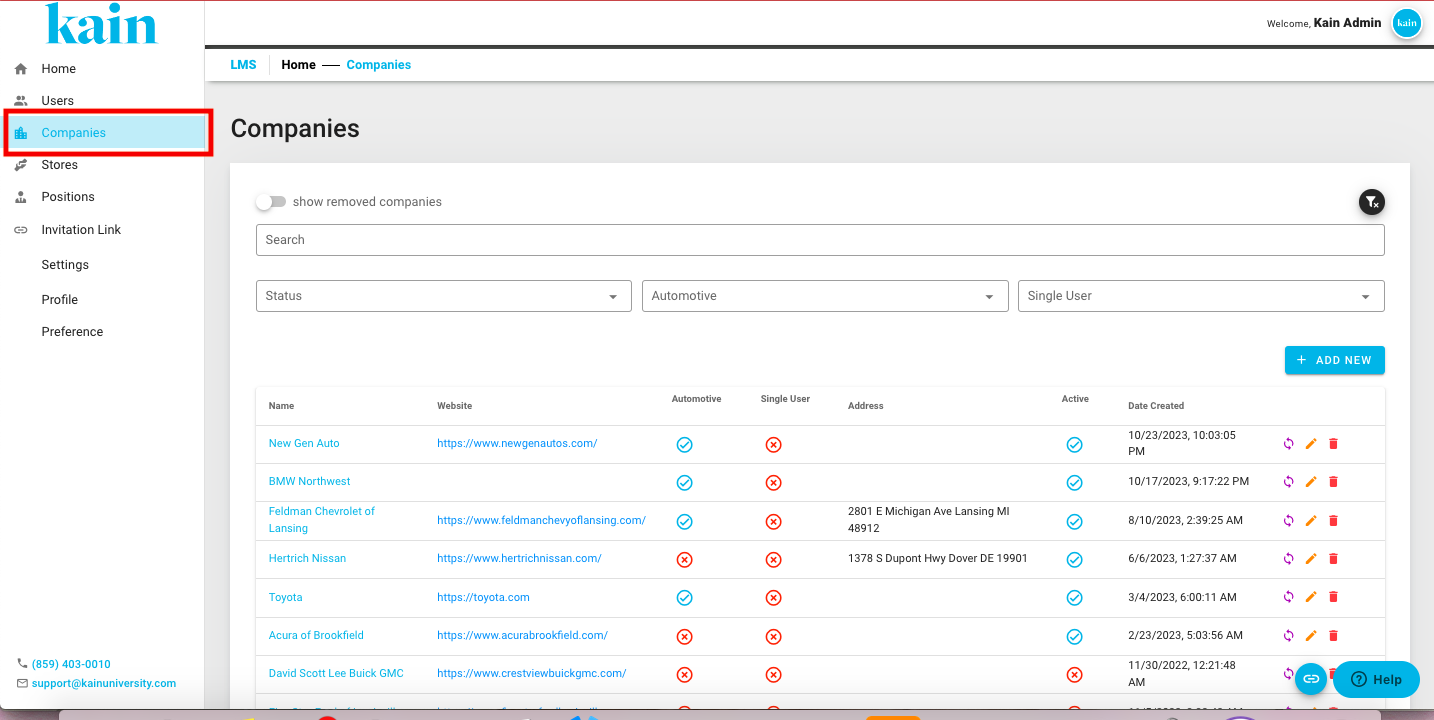
Step 2: Initiate Adding a New Company
On the Company Management Interface, click on the “+ Add New” button.
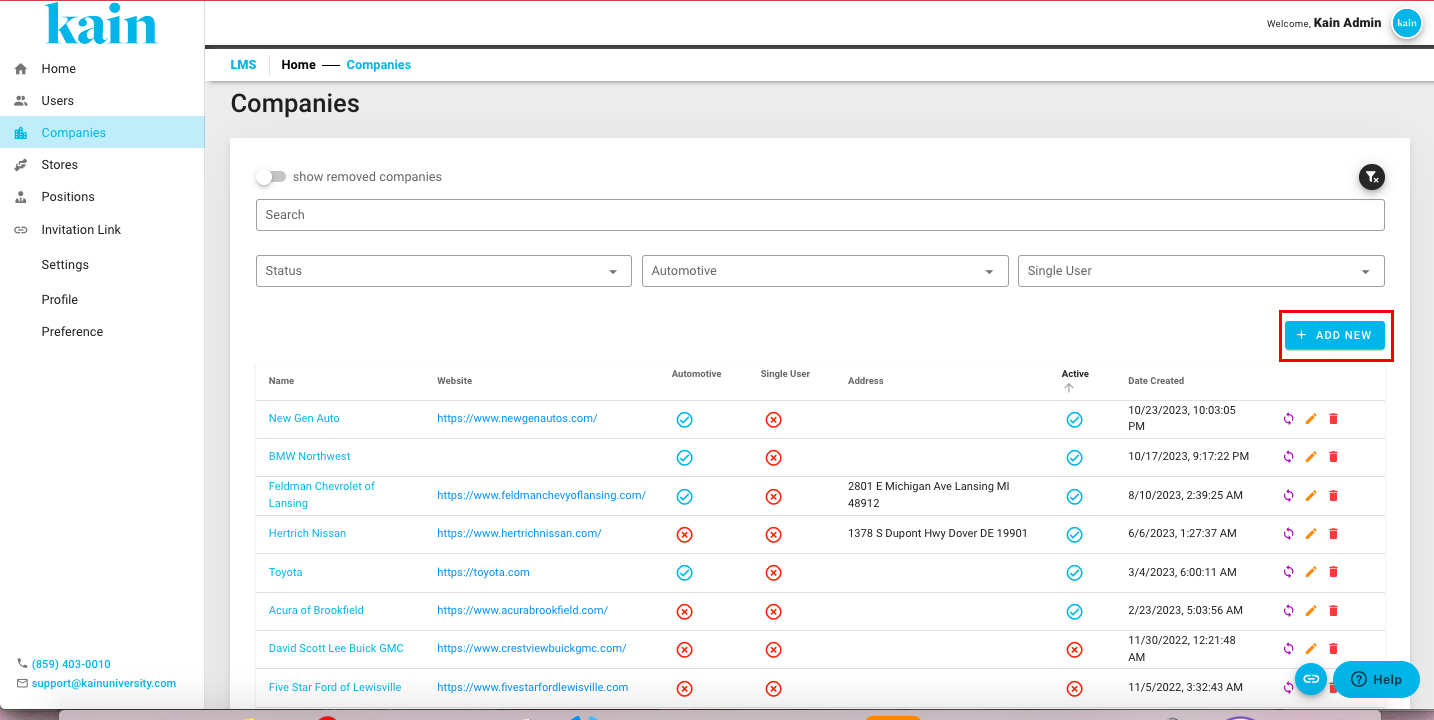
Step 3: Fill in Company Details:
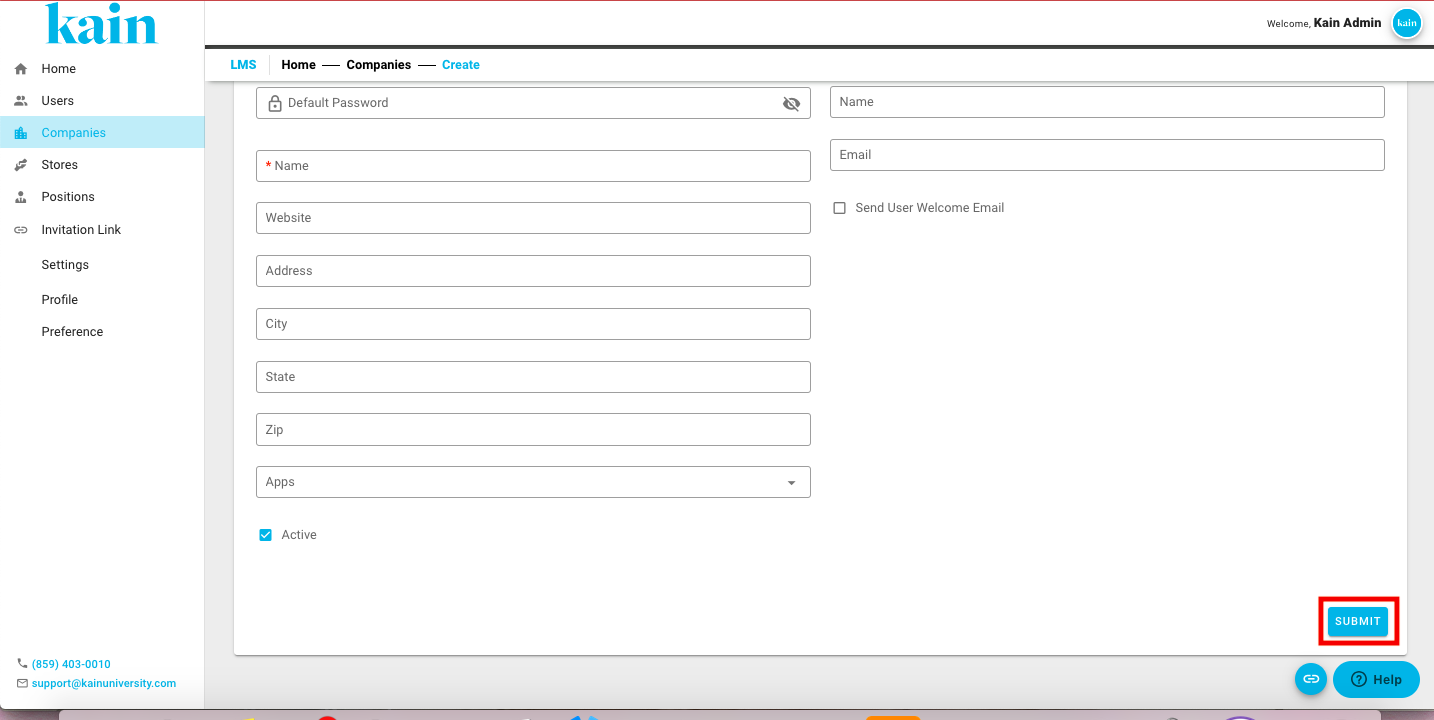
Enter necessary information for the new company, including:
Automotive or Single User
Default Password
Name
Website
Address
City
State
Zip Code
App Access (LMS and/or Mystery Shop)
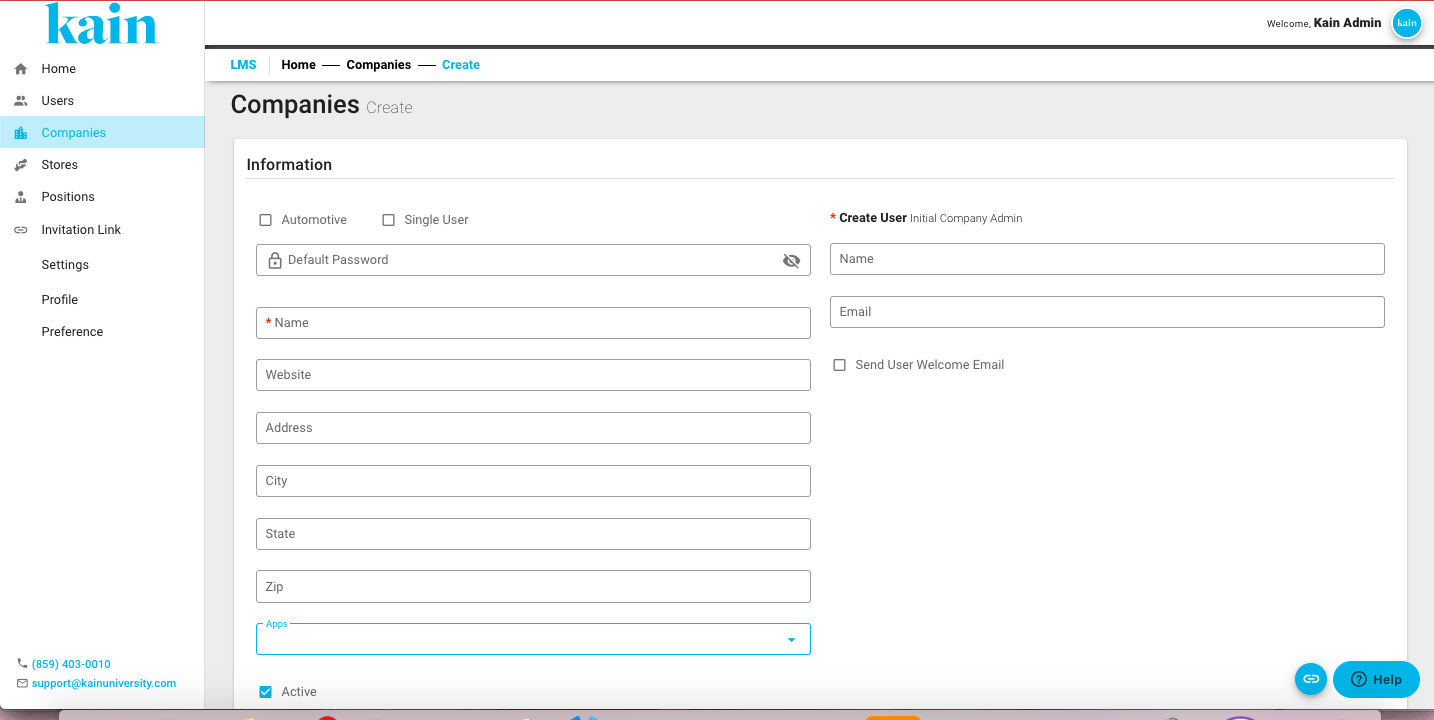
Tick or untick the “Active” box to set the Company Status
Create an Initial Company Admin and enter their Name and Email Address.
Tick the Send User Welcome Email option to notify the new user.
Step 4: Save and Confirm
Review the company details to make sure the information is accurate.
Click on the “Submit” button to add the new company to the system.
