Assigning a Course
Courses on the LMS can be assigned to individual Users, Groups, or Stores.
Assigning a Course from the Dashboard
Step 1: Access the Courses
Navigate to the course catalog on the Dashboard by scrolling down or use the search box to search for a specific course you to assign.
Once you’ve found the course you want to assign, click the “Assign Course” button.

Step 2: Set the Parameters
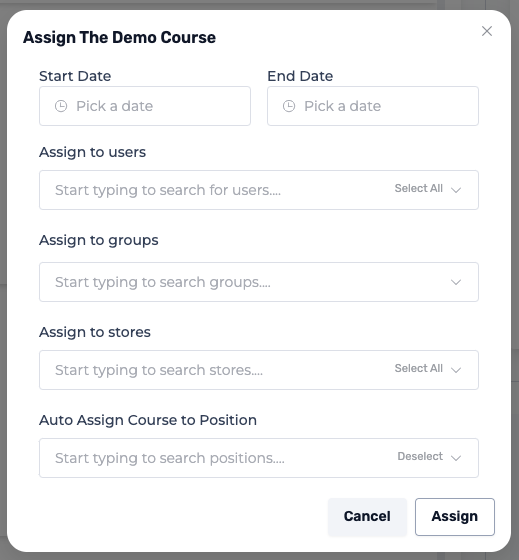
A pop-up window will appear that will let you set parameters like start/end dates and which users to assign the course to.

Pick a Start Date and an End Date.
Pick which Users you wish to assign the course to on he drop down menu. You can also click on the “Select All” button on the right side of the drop down box.
Pick which Groups wish to assign the course to on he drop down menu. You can also click on the “Select All” button on the right side of the drop down box.
Pick which Stores wish to assign the course to on he drop down menu. You can also click on the “Select All” button on the right side of the drop down box.
Step 5: Confirm Assignment
Review your selections to make sure you’ve chosen the right Users, Groups, and/or Stores to assign the Course.
Click the “Assign” button on the bottom right corner of the pop-up window.
Assigning a Course, Module, or Unit from the Course Page
You can also assign a specific Course, Module, or Unit directly from the Course Page.

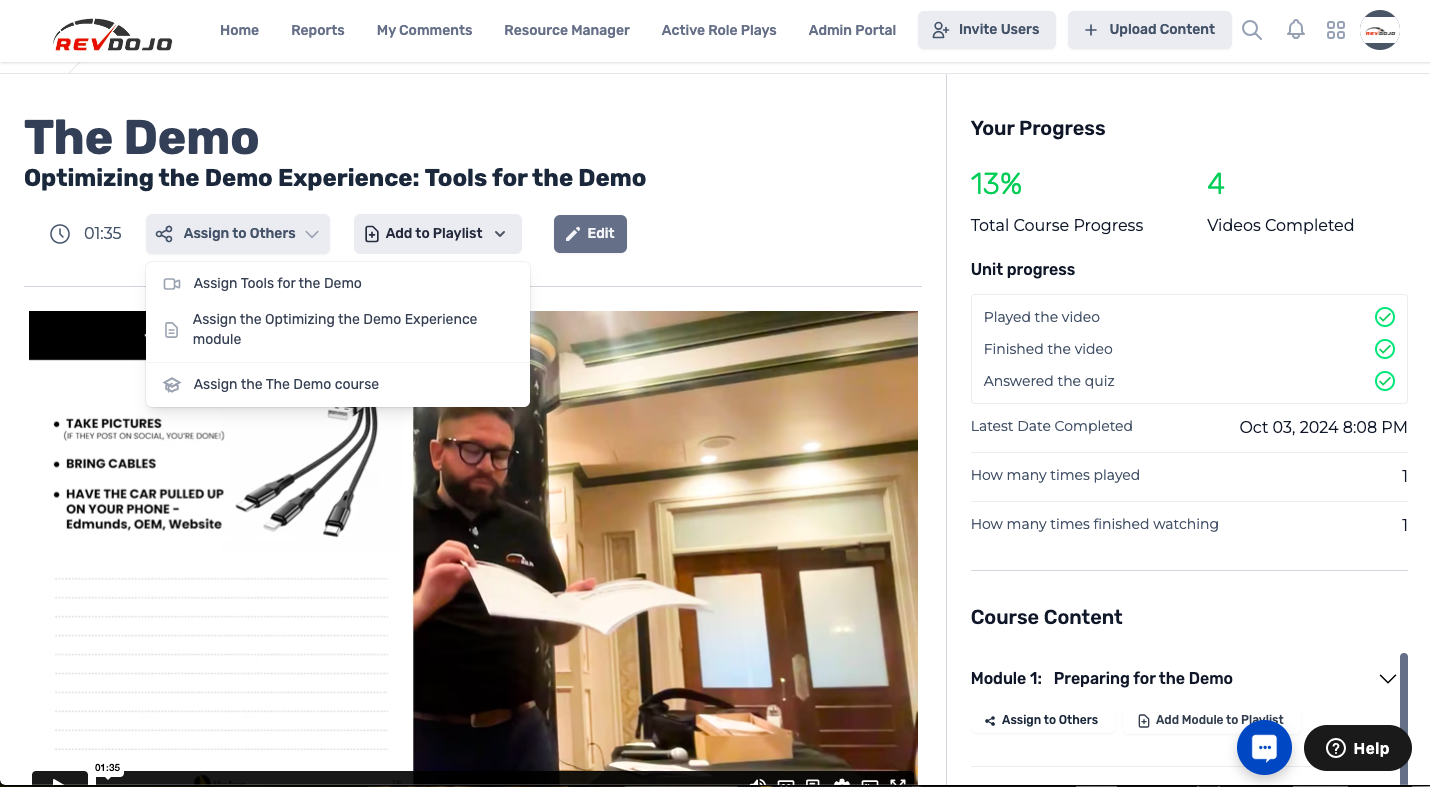
Step 1: Click the “Assign to Others” Button located under the Course Title.
Step 2: On the drop down menu, pick whether you’ll assign the Unit, Module, or Course.
Step 3: Set the parameters on the pop-up window. Pick a start/end date and pick which User, Group, or Store you wish to assign it to.
Step 4: Review your selection and click the “Assign” button on the bottom right corner of the pop-up window.